About This User Guide:
This living document aims to serve as a reference for how to use the Intelligent Candidate Assessment process and to help users understand what to expect. It also can serve as a reference for teaching new users.
nectarflow’s AI Agents:
What is AI? What are AI Agents?
These terms are used often and sometimes incorrectly on the internet. In this work setting “AI” refers to a private connection to an LLM (Large Language Model, you may know them by the names ChatGPT or Gemini, but there are many more out there), this connection has extra training data around your company and its brand voice. The reason we use this private channel is to keep the brand’s data confidential so it cannot be used by the models to learn.
To accomplish the goal of reviewing resumes in this case, we string many specific requests to the LLM’s together with each building on the previous. The steps then resemble how a user would logically accomplish the same task. We call this chain of reasoning ‘agentic’, combining the concepts we form AI Agents.
The Agent’s only goal here is to assist in extracting information from resumes, summarizing it, and giving them a ranking. To do this AI Agents will follow the same step by step process users would, from gathering basic information like name and phone number, compare the resume against the job description, and identifying any gaps to ask about in interviews. The AI Agents will keep the user informed by updating the status at each step of the process.
Indeed Interface Tour (For setting up email triggered automation):
Ensure the AI Agents email address is added to the list of Indeed notification recipients. It is recommended to still have a recruiter's email getting notifications because if a candidate sends a message indeed will send an email. It will give you a warning the email has no Indeed access, ignore this warning.

Make sure “Include Attachments” is checked.

Make sure “Resume is required” is checked.

User Interface Tour:
The main user interface is intentionally designed to resemble a spreadsheet. With headers, columns, filtering and sorting. We will break down this interface in detail.

At the top of the columns there is a tool bar. This allows you to switch views, filter the current view (note it adds this filter for all users, not just yourself), sort by a column, group by certain data points, share and hide.

The most useful tool here will be the views. We’ve pre-made 5 views, “All View Resumes” shows everything in the table, the subsequent views only show you resumes according to what they were labelled by the Ranking AI Agent.

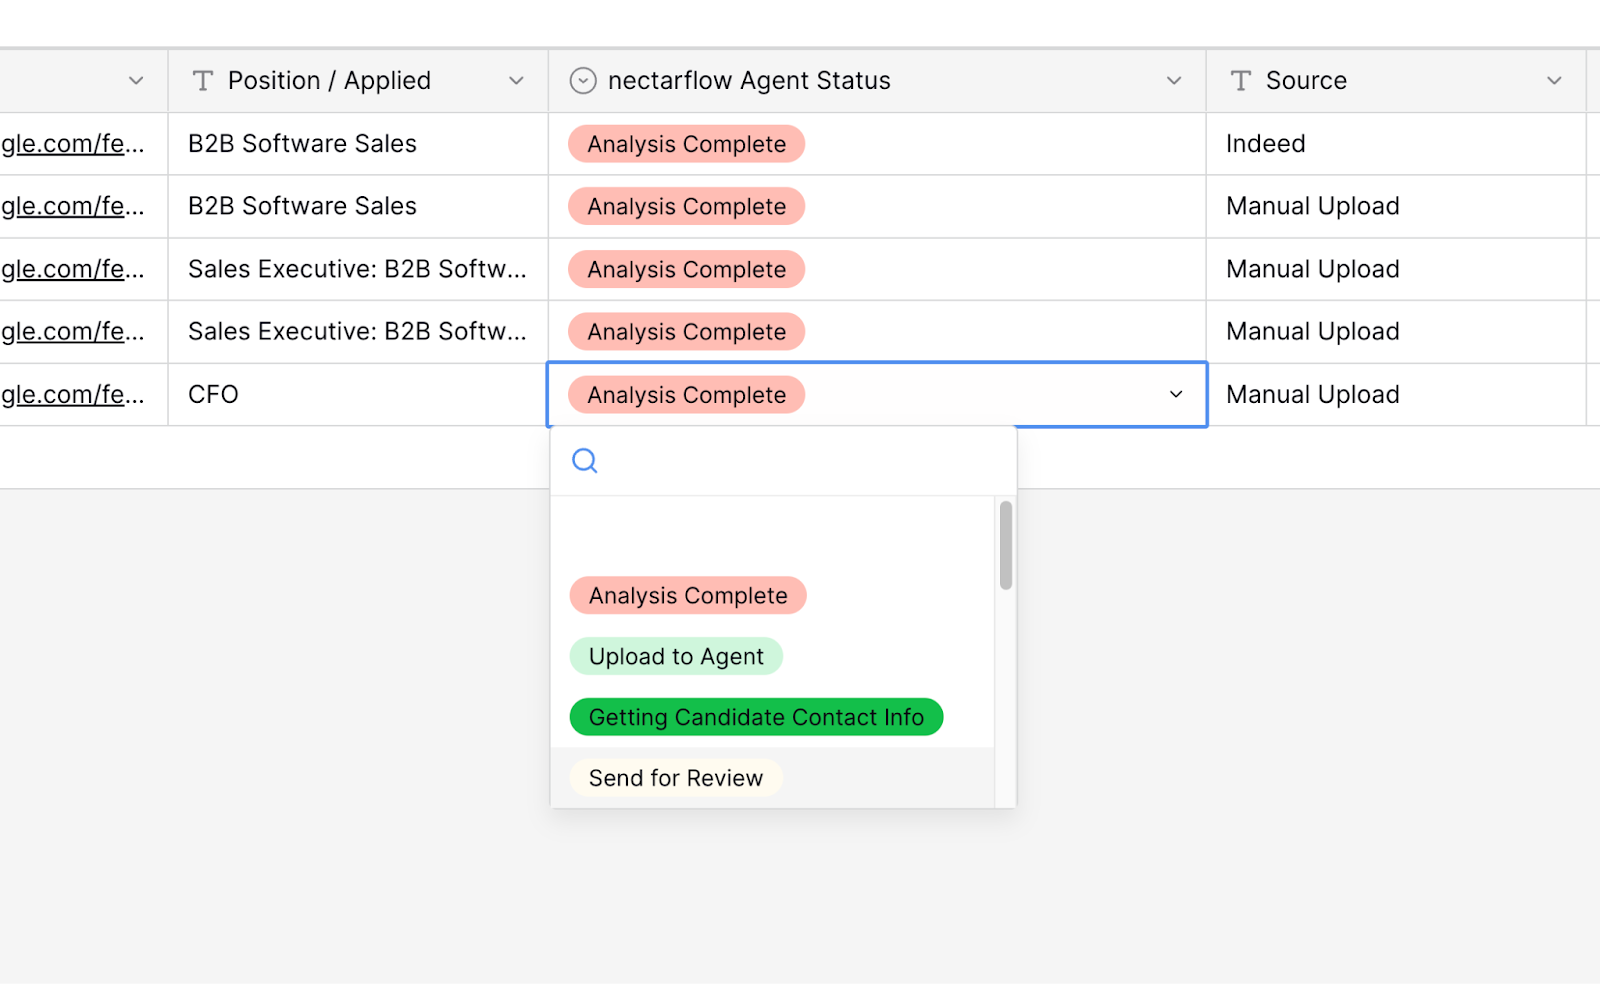
As we alluded to previously, Statuses refer to where we are in the process. You will only need to interact with 1 status in the manual process, the “Upload to Agent” status will trigger the workflow to begin. These statuses help keep everyone organized.
If you want to view a detailed long form popup of a row, simply click the expand button in the ID column (see below). To close this view click the X in the top right.

Steps To Use:
How to add a job position:
Step 1:
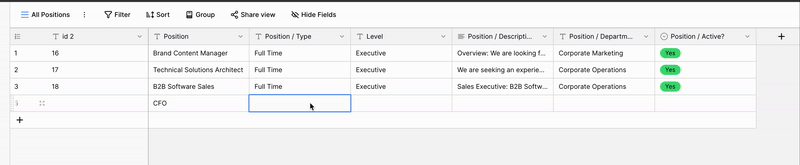
Navigate to the positions data table and click the plus sign to make a new row.
Step 2:
Put in the job title, Note: this must match the job title on Indeed

Step 3:
Enter the rest of the job information.
Indeed email trigger:
There are no user steps once Indeed is configured. The reports will be screened and analyzed as they come in and the report will be emailed to the designated employees automatically.
Manual Resume Upload:
Step 1:
Navigate to the positions data table and click the plus sign to make a new row.
Step 2:
Click on the plus sign in the empty “Resume Upload” cell.
Step 3:
Drag or browse to your file and click on it.
Step 4:
Click on the blue “Upload” button to confirm the upload.

Step 5:
Next enter the Position title they applied for. Referencing the Positions Table. Note: this must match the job title in the positions table.
Step 6:
Change the nectarflow Agent Status to “Upload to Agent”.
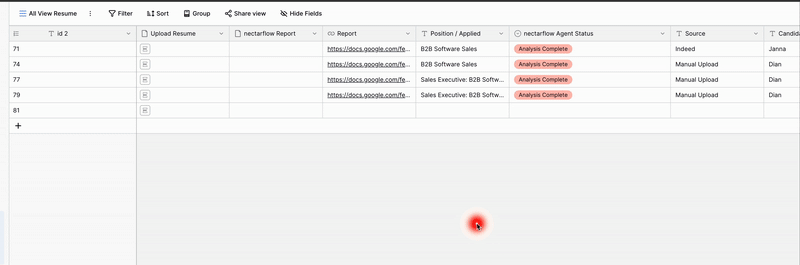
The status will update as the AI Agents process the resume. Details will populate and can be viewed easily in the detailed view. At the end of the process a report will be generated and emailed as well as saved to the data table.

Example Email:

FAQ’s:
I accidentally changed the status to something besides “Upload to Agent”.
Only the “Upload to Agent” status begins the workflow, changing the status to something else does not create any problems.
Do I have to use the interview questions the AI Agents generated for me?
No, those are suggestions based on the specific resume and job position the AI Agents looked at. These questions are in addition to your usual interview questions.
Was this article helpful?
That’s Great!
Thank you for your feedback
Sorry! We couldn't be helpful
Thank you for your feedback
Feedback sent
We appreciate your effort and will try to fix the article